This post is Part Three of our Complete Guide to Sourdough Bread Making! If you’re just starting out, check out Part One (How to: Shortcut Sourdough Starter) and Part Two (The Beginner’s Guide to Dough Making and Development).
Sourdough bread making is a science just as much as it is an art– and we are going to cover both aspects of it here! Of course, if you have any questions about sourdough you can leave them below or send us a message on social media! We’re here to help!
Part One: Sourdough as a Science
flour selection
Bread flour
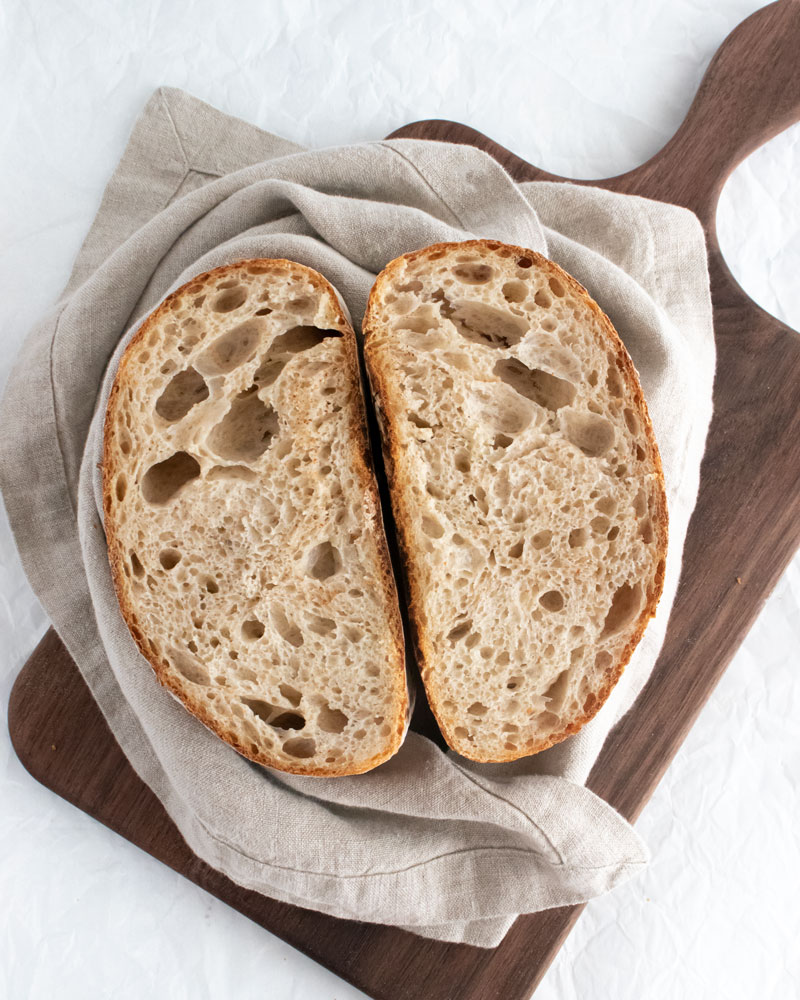
Ingredient selection is important. I’ll be placing the most emphasis on flour selection as it has (from my experience) the greatest impact on your final loaf of sourdough. I bake almost entirely with standard unbleached white bread flour. Bread flour has a higher protein percentage than all-purpose (typically 13% for bread flour and 8-10% for all-purpose). I’ve found that using bread flour creates a more stable loaf with the thin, crunch crust and open, spongy crumb. If you’re using the recipe provided in Part Two of the Baking Guide, using bread flour will give you an open crumb every time.
all purpose & Whole wheat flours
However, I’ve also made loaves using all-purpose, whole wheat, and dark rye flours. Using all-purpose provides the most similar loaf as it absorbs water at about the same rate as bread flour. Whole wheat flour, on the other hand, contains both the germ and bran portions of the wheat kernel and they are able to soak up more water than traditional all-purpose flour made only from the endosperm portion of the wheat kernel. This means that a loaf made with all whole-wheat flour will be less hydrated than one made with a white flour. You’ll see why this is important in the next section but in short: lower hydration= smaller holes = more uniform dough.
rye flour
Lastly, rye flour is a whole different ballgame. Loaves made using rye flour are more dense than those made using another flour because rye flour has a lower protein level. In addition, rye breads are not kneaded because the gluten cannot be developed in the same way. Kneading rye bread shreds the protein networks, not strengthens them. All of these factors lead to a denser, tougher loaf.
bread hydration
Bread hydration is calculated by dividing the the total water mass by the total flour mass. It is always stated as a percentage so make sure to multiply the final number by 100. To calculate the hydration of the recipe used in Part Two, it would be done as follows:
Total Flour Mass: 300g (from recipe) + 37.5g (from 75g of 100% hydration starter) = 337.5g
Total Water Mass: 200g (from recipe) + 37.5g (From 75g of 100% hydration starter) = 237.5g
So the total hydration would be: 237.5/337.5= 0.7037 * 100 (to get a percentage) = 70.37%
Breads with higher hydrations have larger holes and are, for most people, harder to work with. Ciabatta has a typical hydration of 75-85% while standard sandwich bread has a hydration of 55-65%. In short, higher hydration = larger holes.
Part Two: Sourdough as an Art
shaping
Sourdough loaves are typically shaped in one of two ways: a boule or a batard; aka, round or oval. Shaping is an important step in bread making because it provides structural support and will affect the look of your overall loaf. When shaping dough, you want to ensure a taut top– one that is smooth and pulled tight. If the dough seems slack at all, it will need a second round of shaping. If you find that your dough is not getting the oven spring you would like, or if it looks flat like a pancake, it was likely not shaped tightly enough.
scoring
Truth be told, the purpose of scoring is to release steam so your loaf doesn’t pop at its weakest seam– although we bakers use scoring to show off the beauty of our loaves as well. By far the easiest way to ensure a clean score is with a bread lame or razor blade. If you don’t have one and you want to step up your scoring game, buy one. They’re cheap and you can find them online or at any kitchen supply store.
scoring parallel to the dough
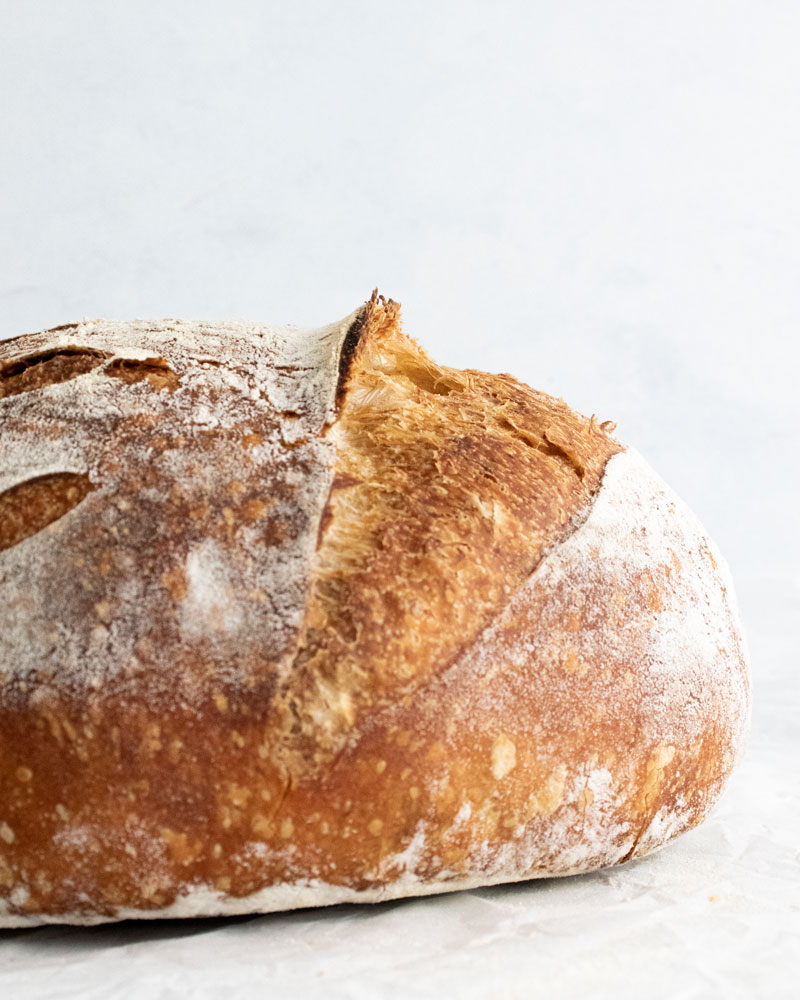
This ear (the crispy part sticking up) was created by one slash across the top of the dough while holding my lame parallel to the dough. I only cut about 1/4″ deep into the dough. This breaks the gluten structure directly below the surface and allows it to grow upward during baking creating this signature look.
Scoring perpendicular to the dough
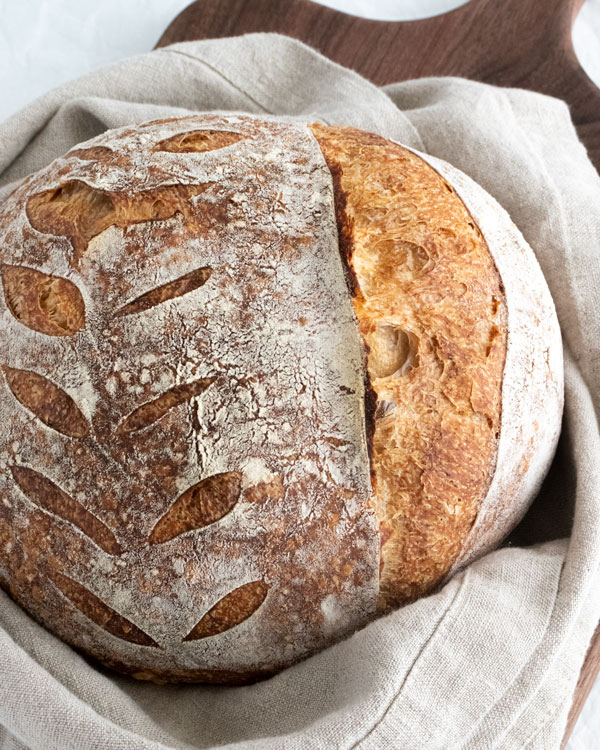
Scoring perpendicular to the dough (keeping the cut very shallow) will allow you to create designs like the one above. No, they aren’t perfect– and they don’t have to be! Just have fun with it!
Leave a Reply